The toilet: Also known as the washroom, the bog, the gents, the ladies, the bathroom, the lav, the lavatory, the restroom, the facilities, the crapper, or what ever else you want to call it… Is one of the highest traffic areas in the workplace. Used all day every day, the toilets will get a right battering and that is why getting the toilets at work clean is very important and could even be classed as mission critical.
We’re judged by how clean our toilets are, so it is important to get it right the 1st time. There are a few steps to follow, which are covered in this guide. This was the way I was trained, which I think is the best way, to making sure your toilets are pristine.
Our washroom gets cleaned once daily, but is checked every hour and cleaned again where appropriate.
Assemble Equipment
You need the right tools for the job, so it is important that you get everything ready. You will need:
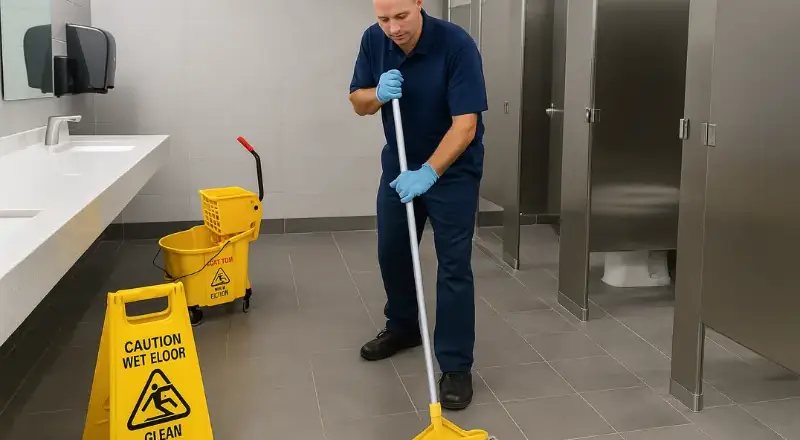
- Caution Wet Floor Signs
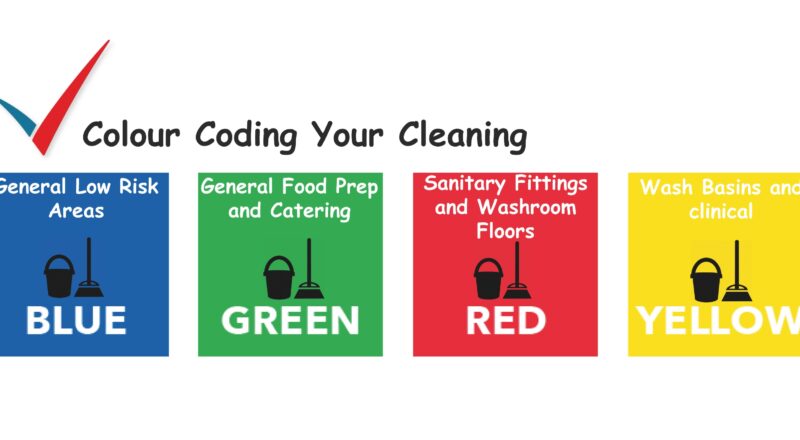
- The correct colour coded mop and bucket
- The correct colour coded broom \ vel mop and the right colour coded dustpan and brush
- The right colour coded cloths
- The right chemicals – disinfectant sprays, toilet cleaner, liquid disinfectant, air fresheners etc.
- Consumables – paper towels, toilet rolls, soap
- PPE – tabard \ apron, colour coded gloves safety goggles.
- Bin bags
Think Health and Safety: Always read the labels on the cleaning chemicals, before using them! Never mix chemicals, as it can result in chlorine gas being released. CLORINE IS TOXIC!
So now we have what we need, start by dosing the right amount of chemicals into your bucket. (in my case disinfectant. We always put the chemical in 1st, before filling the bucket. This avoids splashing.
Step 1: Prepare
Now we need to prepare to clean. It is a good idea to knock on the door and announce yourself. If there is someone in the toilets, wait for them to leave. Now prop the door open and put the wet floor sign in the doorway, with the side that shows ‘cleaning in progress’ facing outward. This lets everyone know you are cleaning.
Step 2: Apply Toilet Cleaner
First, flush the toilet. The reason we do this, is to make sure anything in the bowl is fully evacuated. Now lower the water using your toilet brush. The brush will help lower the water below the normal level and allow the toilet cleaner to clean below the water line. Now apply a thick layer of toilet cleaner under the rim of the toilet, making sure the entire surface of the bowl is covered. Don’t scrub yet, leave it to soak.
For Urinals, use the same method. On Steel Urinals, you will need to use a acidic chemical, which will not damage the surface.
Step 3: Clean all Surfaces
Spray all surfaces, using disinfectant spray. This includes the toilet cistern, all parts of the seat, the flush handle, the outside of the pan, (including the soil pipe) the sink, taps, mirrors, towel and toilet paper dispensers, sanitary bins, hand dryers, the outside of urinals and vending machines. (where present) Make sure you give these surfaces a thorough wipe down.
For surfaces such as door handles, locks, light switches and call points: Spray cleaner on the cloth and then wipe over.
While you are at it, now is a good time to replace consumables, such as toilet rolls, hand towels, sanitiser and soap. Also now may be a good time to also empty bins and replace bin liners.
Think Health and Safety: Do not try to empty the sanitary bins, this is normally done by a specialist contractor, such as PHS.
Do not clean the inside of the toilet pan yet!
Step 4: Sweep the Floor
First remove larger debris by hand. (Paper Towels, big bits of loo paper and other rubbish. Use either a broom or a Vel Mop, (Fluffy flat mop) to mop the floor. Work from the furthest point, working towards the door. Sweep any debris into a pile near the door and sweep up with your dustpan and brush.
Think Health and Safety: Beware of hazards such as hypodermic needles and other objects that may be hazardous.
Step 5: Clean the Toilet Bowl
Give the inside of the toilet bowl a good scrubbing with your toilet brush. The same goes for urinals. Make sure you really work the toilet cleaner into the pan \ urinal, so it foams a bit. Now give the toilet a good flush. For Urinals, you can gently flush with a bucket of water or wait for the auto flush.
Nearly done!
Step 6: Inspect
Go back and inspect your work and correct anything that has been overlooked.
Step 7: Mop the Floor
Now mop the floor, starting from the furthest point. I prefer to mop side to side, working backward across the room. Make sure you rinse your mop, (by dipping it back in the bucket and ringing regularly) as you go.
Once the floor has dried, remove the wet floor sign and put the toilets back into use.
And that is the correct procedure for cleaning toilets in the workplace 🙂


-A198EEV2.jpg)