Just a quick reminder that the clocks go back 1 hour at 2am tonight…. British Summertime ends here, for another year! 😢
Please feel free to “Cher” this post! 😂

The Weird and The Wonderful World of Aaron Bennett
| Radio Presenter 🎧 | Facilities Manager 🧹 | Gay 🏳️🌈 | Autistic 🧩 | ADHD 🧠 | Cat Dad 🐈 | Train Sim Driver 🚇 | Published Children's Author 📖 |
The weather today has deffo been wet. On the way to the shop, I got soaked and had to borrow a pair of trackies from the stock room, as mine were soaked through. At the shop, I spent most of the morning on the shop floor. This was because of the rain. Our floor got absolutely drenched, by the customers coming in and out. So, I had my mop and bucket on standby and kept mopping the floor. Of course, I had the wet floor signs out, to warn people that the floor was slippy.
Then when the rain finally stopped, I was able to cover Maria on the till. That was a baptism of fire, as the till kept crashing. After several attempts (and after having to get Bethan and restart the till 3 times) the till finally started to work. Thankfully, Pat was coming on duty, so the till was no longer an issue for me. However, toilet checks were now over a hour past their due time, so I nipped up and had a quick brew, before going into toilet cleaning mode.
Thankfully, myself Maria, Bethan and Kira are quite clean, so the loos were not too bad. I almost missed the bus home, as I had to go back and take my lanyard back in. Can’t loose that, it has my locker key on it!!!!!
Tomorrow, I have the Health and Safety checks to do. – Emergency Lighting, Fire Fighting Equipment, making sure the exit routes are clear and of course the Fire Alarm Test. I am hopefully meeting up with my friend Chris at 1 and going to lunch. I don’t where though, but it will be good to have a catch up. Thankfully, I have my trusty radio, if I am needed in the meantime. I have not seen Chris in years, so be good to catch up.
Another 40 mins and I will be taking Splodge round to Steph’s for a play, while we watch Shameless. 🙂
I am feeling better than I was yesterday. I have had 3 lots of the antibiotics, which is helping to get rid of the infection. I managed to go into the shop today and got quite a bit of sorting out done.
I decided to sort out the caddies that contain our stickers, tags and Gift Aid tags. In this caddy, there was all sorts. Pens, scissors, paperclips and all sorts of other bits and bobs. These all found new homes, especially the scissors, which are now on hooks on the workstations in the Sort Room. All the stickers are now stacked neatly, so it is easier to find things. Then I sorted the “Rags Bags” box. Rags are the clothes we cannot sell, for what ever reason. These get recycled and sent to Third World Countries. We have loads of rolls of these bags, so I stacked them neatly.
After lunch, I did a bit of work behind the till, serving customers, so that Maria could have a break. Then I did my usual cleaning duties before I left. Bethan wanted to know what the address was to the stream for my show, so I wrote that down for it. Because of the amount of pens that do not work, this took me a good 10 minutes! It meant that I was late leaving today. However, I got back for my show and played Bethan and the gang a song or 2.
So I have a UTI at the moment. This is a Urinary Tract Infection. It has been caused by my catheter, which goes through the base of my belly. (Much better than up the other way) Trying to get a Doctors appointment is impossible these days. I struggled at work and I managed to get a couple of jobs done, including a stock inventory of my cleaning supplies and cleaning the toilets. However, by 12m the pain was really bad and I really felt unwell, so I had to cave in and tell Lucy that I am not well enough to continue and had to go home sick.
I went up to Urgent Care at the Hospital to get seen and had my urine dipped. No surprise, it is full of bugs, so guess what? I am back on Antibiotics. 🙁
Hopefully tomorrow, I might feel a bit better and in less pain. I hope so, because I love my job and hate being off sick. Keep your fingers crossed. 🙂
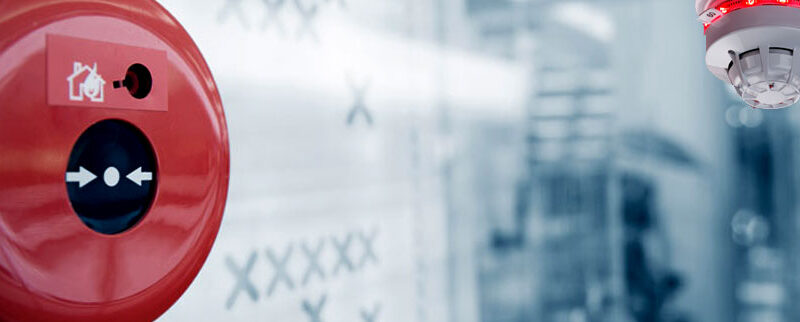
A Fire Alarm System in any business premises, is a valuable and vital bit of kit. It keeps us, our equipment and our stock safe. But how does it work? In this article, we shall delve in and find out.

This is a basic setup. There are 2 zones (areas that are monitored) and each has a call point and a bell, as well as a smoke detector. The system is wired in a continual loop, which is then fed back to the Control Panel.
The Control Panel is the brains of the operation and keeps an eye on the system and it’s functions. It has several indicators, to show the location of a fire, the location of any system faults, zones that may have been disabled and have controls to silence and reset the system, among others. controls the system’s functions, and they can be programmed using software provided by the manufacturer or, in some cases, through the front panel buttons.
It contains a motherboard, with integrated memory and a microprocessor. The Board has connectors for each device. This is usually via a terminal block at either end of the board. This is soldered connected to the motherboard The Fire Alarm Panel will normally run it’s own software, which controls the board. This software is essential for tasks like programming devices, managing zones, and displaying alerts, allowing the control panel to identify the exact location of an alarm or fault.
The system may have been setup to prevent unauthorised use of the programming and other controls. This may be a key, a combination of buttons, (which are used as a pass-code) or both. On many systems, you will need to access the ‘Supervisor Mode’, before you can silence and reset the alarm.
In more complex systems, such as in offices or hotels, the system may be addressable. This will show the exact location of the suspected fire and which device has been activated. For instance, Zone 2 – Kitchen (Smoke Detector Activated) This makes it easier to locate where the alarm has been activated from and allows investigations to be carried out, to determine if the fire is real or if it has been activated for other reasons. (IE: Steam)
On systems in hotels and offices, the system often has Pre-Alarm Circuit. When the alarm is activated, it will not sound the alarm throughout the building. (This prevents unnecessary evacuation) Instead, it will either activate a single bell, (for instance, in reception) or will make a buzzer sound on the control panel. (In a CCTV Control Room) Either way, the red light for the corresponding zone will flash on the control panel, to indicate where the alarm is sounding from. As mentioned above, on addressable systems, the system will show which device has been activated and it’s location.
On some systems, Pre-Alarm will only activate the bells \ sounders in the zone of origin, as well as on the Control Panel. The system can also be programmed to send a text or paging message, depending on the setup. (This is only usually the case in very large buildings, such as Hospitals or very large Office Blocks.)
Pre-alarm will initiate a countdown, which will allow staff time to investigate the reason for the alarm going off. This allows them to locate the equipment activated and determine if it is a false alarm and reset the system if needed. This timer can be anywhere from 2 minutes up to 5 minutes. Once the countdown timer reaches zero, the system will go into ‘full alarm state’ and sound the alarm throughout the building.
If a fire is found, full alarm can be activated, by smashing the glass on a call point. This will stop the countdown and immediately sound the put the system into alarm state. The alarm can also be activated from the main control panel, by accessing supervisor mode and then pressing the Evacuate button. (On some systems, this button is named Sounders \ Off. however, it does the same thing)
The Fire Alarm System is wired into it’s own circuit on the building’s electrical system and should have it’s have it’s circuit breaker on the main Distribution Panel. It will also have it’s own connector to the mains, which does not have a switch. However, some systems have a key switch, which allows the mains power to the panel to be isolated. In general terms, the power should never be disconnected.
The system should have a battery backup, to allow the system to continue to operate during power outages. On smaller scale systems, this is a internal battery, similar to a car battery, but on a smaller scale. Alternatively, the system may have it’s own uninhabitable power supply, Often this is located near the fire alarm panel and is normally a white box, with a green light. (This indicates that the battery is charging)
In larger buildings, such as Hospitals, the generators will power the system.
The Control Panel would flash fault and display the zone \ location, if you disconnected a Smoke Detector Head. On addressable systems, it would show the exact room that the fault is in. It is important never to disconnect or cover a smoke detector head. It is there to save your life! Additionally, you could get into trouble, for fiddling with the system.
Now lets look at how it works.
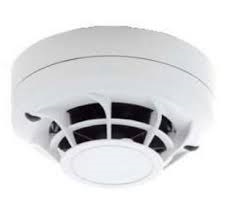
In this scenario, Leslie has left a heater on in zone 2. Near to the heater, is a tea towel that is hung on a rack. The tea towel falls off the rack, lands on the heater and begins to smoulder. Very quickly, the situation escalates and a fire breaks out. Smoke quickly begins to fill the room, which the smoke detector detects. This is through a beam that is in the smoke detector. The smoke is thicker than air and is what will break the beam.
This causes a break in continuity in the circuit and sends a SOS message to the control panel.
The Control Panel will know where the fire has been detected from and will then send a message to the bells, making them start to ring. – Thus alerting people in the building there is a fire. On the control panel, a buzzer will sound and a red light will flash in the fire zone, where the alarm has been activated from. Now Leslie knows there is a fire in Zone 2, which is upstairs.
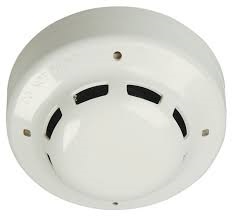
In this scenario, Leslie has left a heater on in zone 2. Near to the heater, is a tea towel that is hung on a rack. The tea towel falls off the rack, lands on the heater and begins to smoulder. Very quickly, the situation escalates and a fire breaks out. The heat from the fire, activates the heat alarm, This causes a break in continuity in the circuit and sends a SOS message to the control panel.
Heat Detectors, use a thermistor, bimetallic strip. The alarm will go off, when the heat rises above a certain temperature. (Usually above 95c.)
Leslie is making something to eat in the microwave. However, the microwave is faulty and bursts into flames. Leslie goes to the nearest Fire Alarm Call Point and breaks the glass. This causes a break in continuity in the circuit, thus sending another SOS Message to the control panel. This also causes the alarm to sound and zone 2 to flash on the control panel.
On older units, there was a glass panel, which had to be broken, to press the button. Break glass units on systems built before 1990, had a little hammer connected to it by a chain, which you can use the break the glass. However, after 1990, this changed. You need to only use your finger to press hard on the glass.
In larger buildings, like Government Offices and Hospitals, there may be repeater panels. These panels act like the main control panel and may be able to silence and reset the alarm. However, they are designed so that you do not need to walk to the main control panel, which could be several floors down. It allows Fire Marshall’s on the floor in question, to see where the alarm has been activated from. These panels may be in a stairwell or by the Nurses Station.
In many buildings, (including ours) the alarm is connected to a autodialler, which will dial out, when the alarm is activated. Years ago, these were linked to the Fire And Rescue Dispatch Centres and would send the Fire Brigade automatically. These days, systems are typically connected to an Alarm Receiving Centre, also known as a ARC. The ARC, will receive a notification that the fire alarm has been activated and they will then phone to see if the alarm is genuine or not. If the alarm is genuine, they will arrange for Fire and Rescue to attend. If not, they will close the call down on their systems. This was designed to lower the amount of false alarms and prevent unnecessary Fire and Rescue attendances.
There is one exception to this and that is in Hospitals. Hospitals have lots and lots of people in them and makes evacuation very hard. Hospitals do have horizontal and vertical evacuation procedures in place, but this is outside the scope of this post. In the event of a fire, the fire alarm system in a Hospital will always send a message to Fire and Rescue and will cause a priority alert to be shown on their screen. This is why you will quite quickly see fire engines turn up, if you have been in hospital and heard the fire alarm go off.
Alarm Beacons will flash, when the alarm activates. This is vital for those that are deaf and cannot hear the alarm. Paging Systems can send a pager message or a text message to a deaf building user, alerting them of a fire.
Automated Door Closers, are wired to the system. These are held open by a magnet, which de-energises, when the alarm goes off.This helps to stop the fire and smoke from spreading.
In buildings that have Air Conditioning and Ventilation Systems, an auto shutdown will automatically switch these systems off. Again, this helps to stop the fire spreading.
Fire Alarm Systems are often linked to the sprinkler system. This can be either a water based or C02 based system. It also will have it’s own controller linked to the fire alarm system. However, this is outside the scope of this article.
So that is how a Fire Alarm System works. I hope you found my post interesting.
I am a bit of a celeb with the local Managers at the BHF. As mentioned in my previous post, Bethan was going to send a picture of what I have been doing to the Area Manager. Our Area Manager has taken it one step further and sent it to all the Shop Managers in the area, who are really impressed with what I have been doing. 🙂 My organising projects have made me a bit of a local celeb in the world of BHF, because I work hard to make sure everyone remains safe and that our store looks it’s best.
It is no fault of anyone, but when I came to the local shop, it was in a state. (Especially the toilet, that had walls covered in cobwebs) and the lino on the shop floor was very neglected. If you have come into our shop, you will see that I am often down on the shop floor and I am constantly sweeping, spray mopping and dusting.
It’s nice to know I am appreciated 🙂
I also finally got my QR Code, which now means I can login to the EPOS System on the Shop Floor. (I don’t have to get anyone to login for me now and I can actually serve customers, under my own login!)
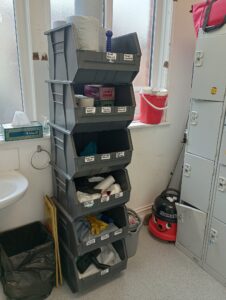
So I have been continuing my project to sort out the cleaning equipment. In my last post, I did say that I was going to tackle the corner where the cardboard was. The cardboard box was full of signage we are not using at the moment, so I got Ahmed to help me and put it on top of the lockers. I then swept the area and put my Tub Vac there. There were a few other bits and bobs which needed a new home, but that wasn’t too much of a problem.
Once I had swept out the area, I was able to put my tub vac in it’s place. I also emptied a couple more of the caddied and bought those up, so now I have a place for my spare mop heads. Of course this means now that my mop heads can be kept clean and are not just lying about. Bethan is so impressed, that she is sending a picture of what I have done to the Area Manager: Kath, who will be really impressed when she comes in November.
I also, as mentioned in my last post…. Got rid of the broken pole for the Tub Vac. It is now feeling very sorry for itself, feeling cold and lonely in the bin shed. I also found a old Socket Mop, which has a removable head. I grabbed that and I removed the head. I have put the head in a carrier bag and the mop head will get washed tonight and returned tomorrow.
I ended up doing my nut TWICE.
The 1st time was with BIFFA, who decided to plonk our empty bins in front of the Fire Exit, meaning that we could not open it. I had to walk round the outside and go and move them. (While up in the stock room and deffo where customers could not hear me!) I had a few choice words for the Bin Men. There is a clear sign, which says FIRE EXIT – KEEP CLEAR. Yet BIFFA still decided to obstruct our Fire Exit. We would have great fun evacuating, If we had of had a fire at the front of our shop, because of the blocked fire exit.
(Actually, I would of yanked the arm of one of the mannequins and used that to break the window, if I had to and I am sure my Kath would ask MSL to charge BIFFA for the window. Thankfully we could sort it quite quickly, but it still shouldn’t of happens in the 1st place.
Code Purple is our radio call sign, where cleaning is required. So if someone spilt a drink on the floor, (which happened the other day) You would radio: “Aaron to Shop Floor – Code Purple”. I would then know I am needed for cleaning duties on the shop floor.
Then someone left the toilet a mess, even though there is a sign that clearly states that the toilet should be left clean. I was not happy. I know who did it, but I can’t really say much about it, which is frustrating.
Then Maria called over the radio, as a window display had collapsed and ended up with myself and Lucy attending, using a mallet to fix i! This was because the arms of the shelf had been bent, so it required a good wallop with a mallet to bed the lugs into shape. Thankfully no customers were hurt, when the display collapsed.
When I got home, Windows decided to play up all through my show, so I was unable to use the cart player. Also the Internet was painfully slow. The machine was egging for a reboot, but I was not having it! I managed though, as I was able to just ad-lib and rebooted after the show. The Computer seems to be better now, as I have also installed Advanced System Care, which helps to keep my system on a even keel!

So I am dressing up for Halloween at work. I am going as Whinny from the Film Hocus Pocus. She is the head witch in the film. I have ordered a costume, which comes with a green dress and wig. Thanks to the magic of Charity Shops… I managed to find a pair of shoes that go with my costume. These pair of bright red heels, will go with my costume and make me look the part.
I shall be serving customers as Whinny and will really get into character. “Would thou like a carrier bag?” I might even burst into song and start singing I’ll put a spell on you!

This is who I will be on Halloween. Whinny is played very convincingly by Bette Midler and is the older and the most evil of the 3 Sanderson Sister. Bette’s portrail of Whinny, was brilliant and that is why I chose to be her, this Halloween. – In the words of Kara – “Diva!”
I might just have to jump on my mop and fly around the shop too! (I can’t fly on the Henry can I!?)
If you have no idea what I am on about, go onto Disney Plus and watch Hocus Pocus. It is a really funny Halloween film. Especially the Kiln Scene. “Hello, I want my book…. Bonjour…. Je veux mon livre!” 😂😂
It has been another busy day down the shop. Myself, Ella and Pat, were the only ones in. So, it was a battle to keep the ship afloat! It didn’t help that all the clothes were in the wrong order, so we spent ages sorting the clothing out. I managed to get the stock room hoovered, spray mopped the shop floor and the hourly toilet checks! Hooray!!!!! (With so many volunteers in and out, our poor toilets get a right bashing, thus the hourly checks.)
One of the jobs that really needed doing, was the reorganising of the cleaning equipment I have caddies under the counter in the kitchen, which wasn’t really the best place for it. Most of the equipment is kept in the Wash Room, so I thought that this would be the best place to keep everything. (The cleaning chemicals have their own dedicated cupboard BTW, which is very neat and tidy)
To enable this, I needed to move stuff out the caddies downstairs. These were full of all sorts and need properly sorting out. However, this is a job for another day…. I emptied what was in the caddies and put the contents into stack and store boxes, which got put into the “Junk Room”. Don’t even get me started on the junk room… That is a right “dumping ground”, for all sorts of stuff and you can’t hardly get in there. There is just about room, to get inside the door! This is another project and something I need to tackle. However, I have no idea what we are going to do with all the stuff piled in there. I think I will have to speak to Bethan on Tuesday and try and work out with her, what we are going to do and how we are going to do it. I think some of the stuff came from the old BHF Furniture and Electrical Store, which was just a few doors up and had to close, after the Nail Bar next door burnt down (on Boxing Day 2022) and caused severe damage to the BHF Store.
It may require us to get a man and a van to shift it, when we have a mega sort out. However, that’s going to be expensive, so I don’t know how we are going to sort it. It could be classed as a fire hazard, so I will highlight it to Bethan and see what she suggests. I am sure if we put our heads together, we can find a way to get it sorted. If we can sort it, the other caddies and the downstairs tub vac, could be put in there.
Back to the sort out…
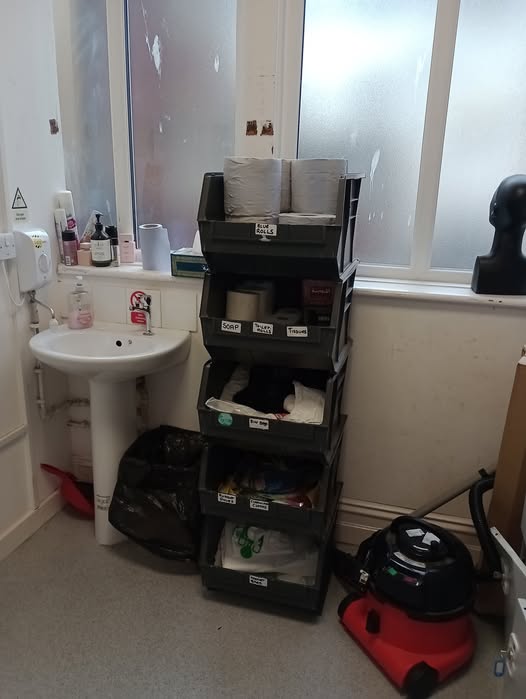
I was able to get sorted, once I had freed a couple of caddies. These came up to the washroom. The Toilet Rolls, Blue Paper Towels and the Hoover Bags, used to live in it’s own plastic box by the sink. However, with the sink right by it, the loo rolls used to get rather soggy. Now the blue rolls, cloths, toilet rolls and hoover bags, all have their own caddy, which keeps everything so much more orderly. It means we can quickly access something, if we need it, without having to take everything out the box. Plus, the loo rolls and the blue paper rolls, cannot get wet any more. 🙂
Lucy will be impressed with what I have done, when she comes in tomorrow morning.
As a continuation of this project: I want to get some clips put on the wall, which will hold the mop and vel mops against the wall. I also want to get in the corner, where the cardboard is. This has various bits used in the shop and can be moved to on top of the lockers, with the other signage. I will have to lift of everything that’s on top first, to be able to do this, but it’s doable. I will be able put my tub vac there, once the corner is cleared. I also need to seal the fate on our broken hoover pole and send it to one of the massive BIFFA Bins. If there’s space, I may also put the ladder at the side of the lockers too. However, the Tub Vac needs to also fit in there, so that may not be possible. A Plan B for this,is to lean the ladder against the wall outside the toilet. This is where the mop and bucket used to live. (But it now lives behind where the tub vac currently is)
Once this was done, I was able to scrub the floor, where the old caddies were and put the bins back under the kitchen counter. It looks much better and the floor is much cleaner too. While I was at it, I attempted to remove a stain from the carpet in the walkway, using the steamer. Whether it worked or not is another question – I will find out tomorrow.
The final job, was to drag the wheelie bins out. This meant donning a High Viz Jacket and dragging the bins from our shed, into the yard at the back. BIFFA come tomorrow to empty the bins, so I will wheel them back in in the morning.
The end of the day was fun. I left and forgot my phone and then Ella and I almost spent the night in the shop, as her key jammed in the lock and it wouldn’t turn! Only kidding about the all night thing… I could of gone out the fire exit at the back, should we not of been able to get the key out. I will give the lock a spray with WD40 tomorrow!
Fire Alarm and Emergency Lighting Tests must be done on a weekly basis, to make sure that systems are working correctly and that equipment operates. In this guide, we will look at testing both systems and what steps need to be carried out.
This is a LEGAL REQUIREMENT, (under The Regulatory Reform (Fire Safety) Order 2005) in all Commercial Premises, Hospitals, Care Homes, Schools, Places of Worship, Offices and buildings open to the public. Also in Blocks of Flats, where there is a wired fire alarm system, Government Buildings and even Pubs and Clubs to name a few, are covered by this legislation.
Your company should have a dedicated form or a Fire Alarm Log Book, where these tests are recorded, It is important to record all tests each time
These tests should be carried out by a competent person, who has been trained to do so. I am a competent trained person, so I assist my manager with these tests.

The Emergency Lights, are designed to come on automatically, when the power fails. This fail safe equipment, is also designed to activate, when the circuit breaker trips, making sure that there is adequate lighting at all times, for whatever the reason why the normal lighting fails. They work, by using an Automatic Transfer Switch, which switches the power over to the batteries, when the mains power fails. They should always gave a green LED lit, to indicate they are charging properly. Call in an Electrician, if the green light turns red, or if the green light is not illuminated. -This normally indicates that the batteries are not charging.

To test the Emergency Lighting, you will need a fish plate key. You need to insert the fishplate key into the test plate on the wall and push the key downward. This should cause the emergency lighting to activate. You will then need to walk about the area you are in and make sure the emergency lighting properly activates. Report any emergency lights that do not illuminate.
Remember to put the switch back in the off position after testing, otherwise the emergency lights will stay on and this will drain the batteries!
If your Fire Alarm System is monitored, it is important to let the Monitoring Centre know you are doing an alarm test. The Fire Service may be called, you fail to let the Monitoring Centre know you are testing the system!
Usually, this is a automated system, which will put the system onto “test” for a short period of time and will not send an alert to the motioning centre. After a short period, the system will go back into monitor mode automatically.
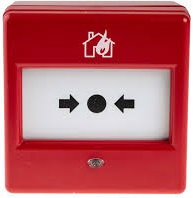
Now we need to test the Fire Alarm itself. Testing from the Panel is not a permitted way of testing. You should activate the nearest call point. On the older units, you need to insert a key into the bottom, which drops the glass. On newer units, activate as normal, by pressing the black button. Make sure that the alarm sounds throughout the building. To reset, push the bottom of the alarm upward, which will reset the call point. Now you will need to go to the Fire Alarm Panel and reset that. (Ours requires the key and then pressing silence then reset.)
If for what ever reason, you need to sound the alarm again, (You might see smoke, fire or something smouldering) operate the nearest fire alarm call point, by breaking the glass.
You should perform the fire alarm test at the same time every week, by activating a different call point, each time you test the alarm. I helped Bethan do the test today and we tested the call point on the shop floor, which I activated.
Depending on how your system is setup, this should activate the Fire Bells, the Electronic Sirens, Voice Modules, (which will announce something like: “The Fire Alarm is sounding… Please leave the building via the nearest exit”.) or the flashing Alarm Beacons. In our shop, the electronic sounders also have flashing beacons integrated into them, which flash when the sirens so off.
Remember to record the test and which call point was activated. Report any issues with the fire alarm immediately.
You should also make sure your Fire Alarm System is serviced Bi-Yearly, by a BAFE Accredited Fire Alarm Company.
You should make sure that your automatic fire doors close, when the alarm goes off. These doors, use a magnet which keeps the door open. When the fire alarm sounds, the magnet de-energises, which causes the door to automatically swing shut, thus preventing a fire from spreading. You should make sure that any automatic doors shut, when you do your fire alarm test.
These doors, should never be propped or be held open by any other means. (Such as the use of a door wedge, propped open with a fire extinguisher, or held open with string. This can stop the auto-closer from working, which could cause a fire to spread. This is separate from the auto-closer you might see on some doors. These will automatically close the door, each time. However, they cannot be permanently held open. Automatic auto-closer can be kept open at all times, as the magnet holds the fire doors open.
Report any auto-closer , which fail to operate, when the alarm activates.
I just wanted to write a post on why I love my job at the British Heart Foundation. I may only be a volunteer, but without us “volis”, nothing would get done. That is why thousands of people up and down the country, give up their time to volunteer at the charity.
I enjoy volunteering at the shop, because it gives me something positive to do. I also get to work with a brilliant team, especially Bethan, my “work wife” – Maria, Pat and the many others that are the literal ‘beating heart’ of the shop. We have plenty of laughs, we, we work hard and we help to raise money for vital research into heart related illnesses. No day is ever the same and our shop is vibrant and welcoming.

We also have plenty of fun, especially when Maria and I get on our Walkie Talkies) We often call each other over the radio and can be rather silly at times, but serious when we need to be. there is a real sense of community, where you are never alone. As Volis, we support each other, no matter what live chucks at us. We have a Whatsapp Group too for many of our shops, so you will always be in touch with your local shop team. (No Tubbs and Edward do not work at our shop, neither do Vinnie and Renee!)
This is a reference to The League of Gentlemen. (Which is one of my favourite sketch shows) “Nooooo need to be rude dear!” (I can do a brilliant impression of Renee btw!)
If you want to come and join a brilliant team, (which cares about each other and have a lot of fun while we are at it) Come and join the BHF. Our Shop Teams are made up of volunteers from all walks of life, different ages and skills. You will be made most welcome, get plenty of brews along the way, get training in your role and get a cheeky 25% off when you buy something from one of our shops. (Even if you are on holiday and visit another store!)
There is so much you can do at your local shop. You can sort donations that come in, do what I do and help keep the shop clean and tidy, work on the shop floor – serving customers, (yet another thing I do) You can put stock out and dress windows, sort out books and brica-brac and so much more.
If your interested in volunteering at your local shop, go online to https://www.bhf.org.uk/how-you-can-help/volunteer or pop in and speak to one of our lovely Managers. Most towns have a BHF Shop, either Clothing and Brica-Brac, electrical and furniture and much more. You can find your local BHF Shop, by clicking here.
Time for bed, I am back in our store tomorrow, working with Bethan, Maria and Pat. It’s going to be another fun but knackering day, I am sure. However, I like days when I come home tired, because those are the days, I know I have made the most difference. 🙂
Before I go to bed, I must mention that I have been watching Shameless. I love Shameless and it’s thanks to my neighbour Steph, that I got back into watching it. Below is the intro to the show, if you have never seen it before.
Good night xxxx